Integrate with AdMob
If you already have AdMob ads serving in your app, you can integrate AwesomeAds without having to use the AwesomeAds Publisher SDK directly.
Add the AwesomeAds maven repository
repositories {
    maven { url "https://aa-sdk.s3-eu-west-1.amazonaws.com/android_repo" }
}
Add the AdMob plugin
Change your module’s build.gradle file (usually the file under MyApplication/app/) to the following format:
dependencies {
    # add the Android Publisher SDK
    compile 'tv.superawesome.sdk.publisher:superawesome:10.3.1'

    # add AdMob plugin
    compile 'tv.superawesome.sdk.publisher:saadmob:10.3.1'
}
Set up Android AdMob Mediation Groups
Next, you need to set up a Mediation Group for each type of AdMob ad that you wish to display: banner, interstitial, and video.
- Log in to the AdMob dashboard.
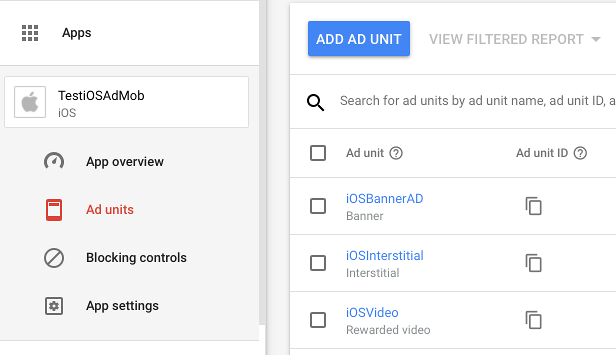
- For this tutorial, assume you have set up an Android app with three ad units in AdMob: one banner, one interstitial ad, and one rewarded video ad:
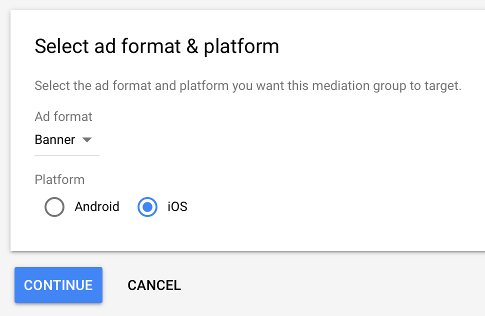
- In the Mediation menu, create a new Mediation Group and set the Platform to ‘Android’:
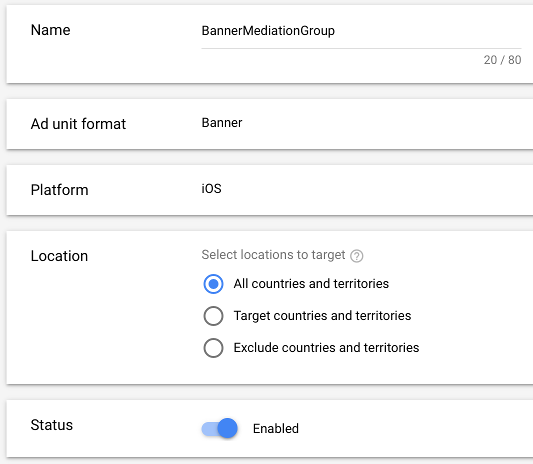
- Enter the Mediation Group Name, and set the Location and Status as shown:
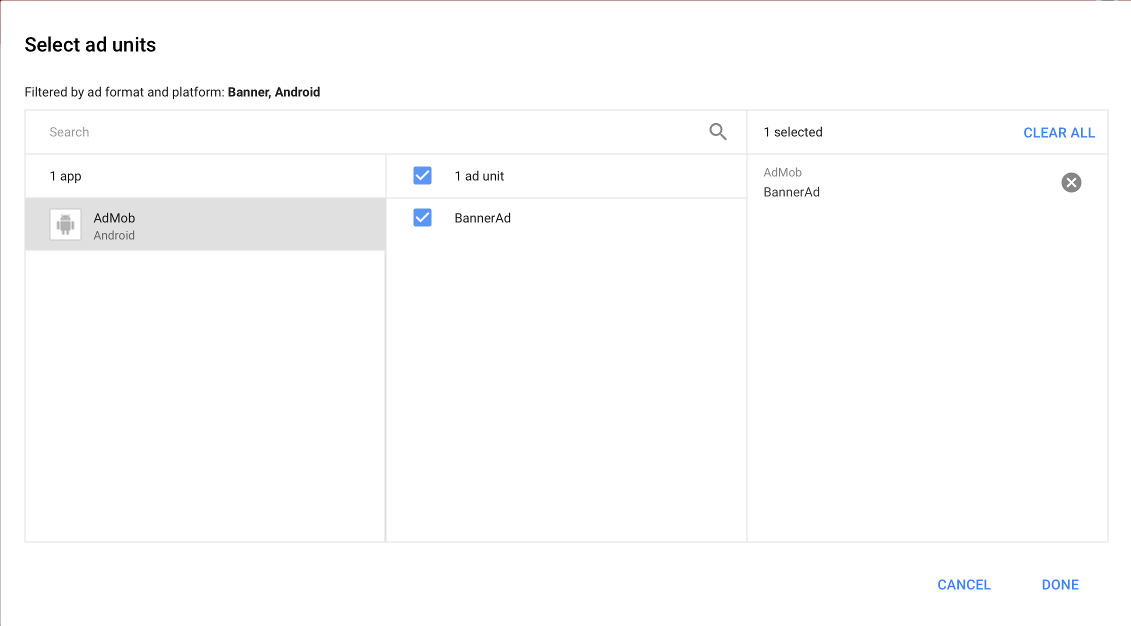
- Add your app’s BannerAd unit as a target:
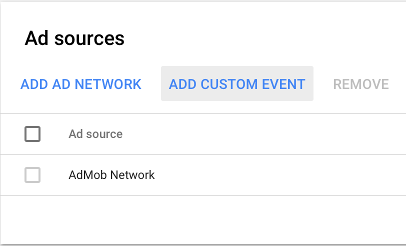
- In the Ad Sources panel, add a new custom event:
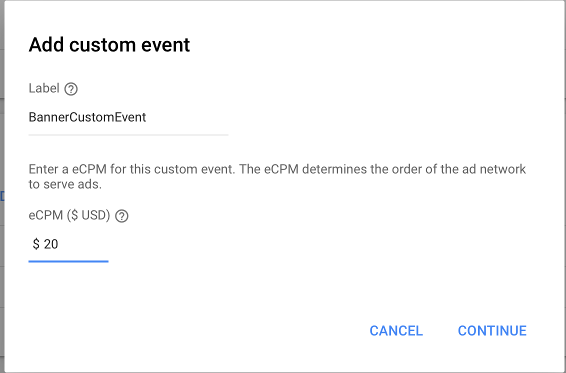
- Customize the custom event. The custom event class names required by AdMob are:
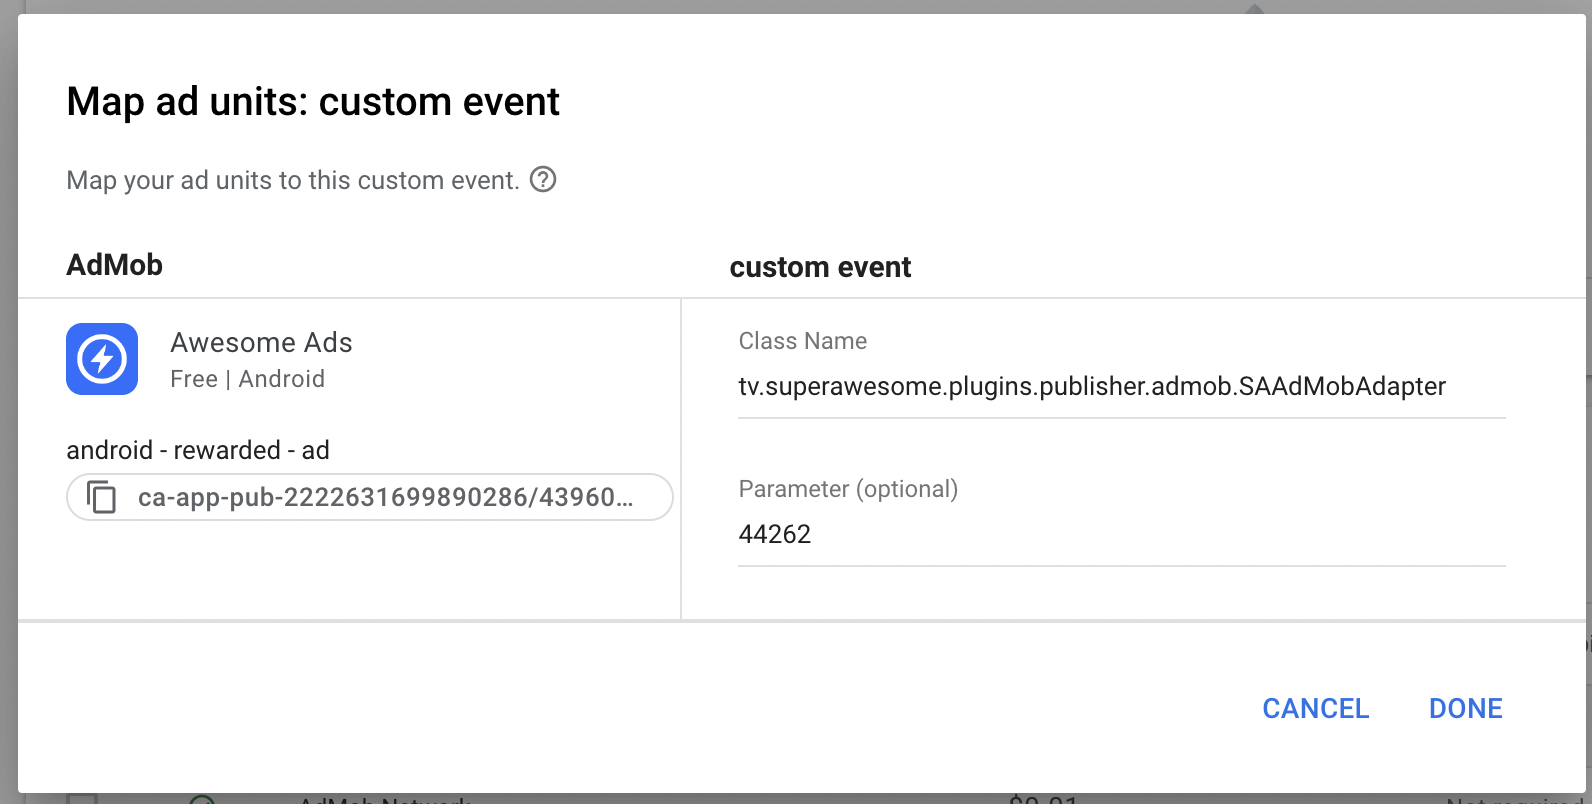
- Class Name:
tv.superawesome.plugins.publisher.admob.SAAdMobAdapter - Parameter: This is your
placementId
You should now have at least two different ad sources.
Finally, save your changes. This will register a custom banner event. You will have to repeat the same process for interstitial and rewarded video ads.
Implement AdMob ads
After you set up the AdMob Mediation Groups, you can add AdMob banners, interstitials and rewarded video ads as normal.
Initialize the app
MobileAds.initialize(this) { Log.d("SADefaults/Admob", "onInitializationComplete") }
Add a banner ad
AdView adView = (AdView) findViewById(R.id.AdViewID);
adView.loadAd(new AdRequest.Builder().build());
Add an interstitial ad
InterstitialAd mInterstitialAd = new InterstitialAd(this);
mInterstitialAd.setAdUnitId("__YOUR_AD_ID__");
mInterstitialAd.loadAd(new AdRequest.Builder().build());
Add a video ad
RewardedVideoAd mAd = MobileAds.getRewardedVideoAdInstance(this);
mAd.loadAd("__YOUR_AD_ID__", new AdRequest.Builder().build());
Since the previously created custom events will run on these ads, and AwesomeAds is integrated alongside the AdMob plugin, you should start seeing ads playing.
Customize the experience
You can customize the experience of each ad unit by building a new Bundle that contains the extra parameters. These parameters are passed by the AdMob Plugin to the AwesomeAds SDK so that ads display the way you want them to.
Customize a banner ad
- Build a new Bundle that contains the extra data:
Bundle extras1 = SAAdMobExtras.extras() .setTestMode(false) .setParentalGate(false) .setTransparent(true) .build(); - Register that bundle as an extra when creating the request:
adView.loadAd(new AdRequest.Builder()
             .addNetworkExtrasBundle(SAAdMobAdapter::class.java, extras1)
             .build());
Customize an interstitial ad
- Build a new Bundle that contains the extra data:
Bundle extras2 = SAAdMobExtras.extras() .setTestMode(false) .setOrientation(SAOrientation.PORTRAIT) .setParentalGate(false) .build(); - Register that bundle as an extra when creating the request:
 mInterstitialAd.loadAd(new AdRequest.Builder()
             .addNetworkExtrasBundle(SAAdMobAdapter::class.java, extras2)
             .build());
Customize a rewarded video ad
- Build a new Bundle that contains the extra data:
Bundle extras3 = SAAdMobExtras.extras() .setTestMode(false) .setParentalGate(false) .setOrientation(SAOrientation.PORTRAIT) .setSmallClick(true) .setCloseAtEnd(true) .setCloseButton(true) .build(); - Register that bundle as an extra when creating the request:
mAd.loadAd("__YOUR_AD_ID__", new AdRequest.Builder()
             .addNetworkExtrasBundle(SAAdMobAdapter::class.java, extras3)
             .build());
These parameters are passed by the AdMob plugin to the AwesomeAds SDK so that the ads display the way you want them to.